-->
Showing posts with label photography tips. Show all posts

Wednesday, December 15, 2010

Tip: Protect those precious memories!


Figured it was time to share a photography tip.

 One of my Facebook friends and former photojournalism students recently posted that she accidentally deleted every picture from her camera's storage card – more that two years worth of pictures! ARGH, indeed!

It's a nightmare for those who are prolific snapshooters. It's one of the hazards in this digital age. With all those confusing menus and options, it's an understandable-but-tragic mistake.

There are a few things you can do to avoid losing precious digital photographs. In fact, for all you digital photography aficionados, I'm going to teach you a mantra. Everyone repeat after me ...

Download, back up, and reformat – often!

Download

Digital photography is just so darn convenient! Cameras can fit in your pocket. That little tiny card in your camera stores thousands of images. Problems can arise, however, when folks treat their camera as an all-in-one picture taker/storage device/photo album. The more images you store in your camera, and the longer you store them there, the greater the chances of losing them to accidental deletion or device failure. And devices do fail. Don't be lulled by the promises of technology.

The simplest advice I can give it to download your images – often. If you frequently use your digital camera, odds are that you have a computer, as well. I won't give a download tutorial because there are too many variables. But most computers ship with photo downloading and storage software. Most cameras ship with similar software, as well.

Another option is to utilize on-line photo sharing sites, like Flickr or Picasa. Technically, this is uploading to a web server. But it achieves the same objective – to get images off your camera's card to a safe place where they can be managed, shared, and displayed.

How often should you download? Personally, I try to download my images after every assignment I shoot. That's not always possible, as I sometimes drive directly from one assignment to the next. In other words – as often as it is practical. Don't let two years, or even one month's worth of pictures accumulate on your card without downloading them.


Back up

In today's digital world, backup is one of the most important and most ignored functions. Like I said, devices fail eventually. Internal computer and external hard drives have mechanical moving parts, tiny as they are, and they eventually wear out. They are susceptible to damage if they are dropped or knocked about, as well. Flash memory devices, such as the cards that store digital images in your camera, don't have moving parts, but they contain tiny microprocessors that can be damaged. Both types of storage can become corrupted over time, as well, and won't be able to write new data to them or correctly read what's already stored on them. This is why back up, or redundancy, is crucial.

Technically speaking, downloading is a form of backup as long as you don't erase your camera's flash card. However, the more times you back up your data, the safer it is. Plus, eventually, you are going to fill up that card. Make a simple backup plan and save yourself some potential grief.

One of the easiest ways to accomplish this is to download your images to your computer and to an on-line photo sharing service. Some services, particularly Picasa, can sync this operation all at once. This requires the download of the Picasa software, but it's free. You can set it up so when you download your pictures through the software, it will automatically save your images to your hard drive and upload them to a Picasa web album. In addition, it will automatically catalogue all of your images for easy searches. I mention Picasa because I'm familiar with it. But check out Flickr and other services to see if you can accomplish the same thing.

Another option is to purchase an external hard drive. They come in all kinds of flavors, sizes, and prices, which start at around $40, but you can drop several hundred dollars depending on the features you seek. Desktop models are less expensive and have higher storage capacities, but portable models can fit in a computer bag, pocket, or purse for easy backup wherever you are. You can simply drag-and-drop image files or folders to copy them from your computer to an external hard, or you can use software to automate the process.
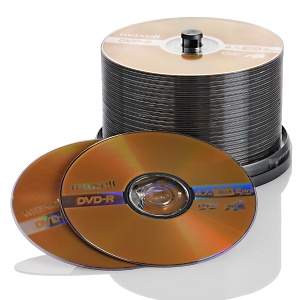
One of the easiest and least expensive ways to back up your digital photographs is to burn them to an optical disk. CD-Rs are an option. But DVD-R is probably the best way to go. They have much higher capacities and, over the years, have proven to be more reliable than the CD format. Optical disks are not practical to work on images from. They are strictly for storage. But they are cheap and reliable. Lots of photo organizing software will allow you to automate the burning process as backup so you don't have to manually drag and drop images and folders.

For some folks, a digital camera might be the only digital device they own. For those who don't use computers or go on-line frequently, most all photo labs will burn a photo disk for you. Whenever you go to have prints made of your digital photographs, spend the extra couple of bucks and get a disk made of all the images on your card. Peace of mind is worth the expense.

At the Herald, I download my photographs to a computer hard drive, then back them up on an external hard drive, and burn them onto DVDs. Eventually, I have to erase the files on my computer's hard drive because it fills up fairly quickly, but they still exist in two separate spaces for the future.

Backup, backup, backup. It's an extra step or two, but necessary if you really want to preserve your images for the long term.


Reformat

If you really want to maintain the reliability of your storage card, I recommend reformatting it every time you download images.

The idea of erasing all those images makes some people nervous. But if you've followed my advice and properly downloaded and backed up your images, there's no need for concern. It gives you a fresh start and you rarely have to worry about filling up your card and missing opportunities for great photographs because of it.

As I mentioned earlier, cards can become corrupted over time. If that happens, you might lose the ability view some images, or even all of them. To prevent this, you need to reformat the card in your camera, at least on occasion.  This not only erases the data on the card, but ensures that the card is set up and structured specifically for your camera.
We rarely think about the memory card in our cameras, but it requires care and maintenance, too. Here's a link for some tips on that: 13 Tips for Using and Caring for Memory Cards.

Still hope

All hope is not lost if you accidentally erase the images on your card. Several companies make data recovery software, and sometimes it's free and comes installed on your card when you purchase it. (You just need to install it on your computer before you start using the card.)

When you erase your card, in reality, the images are hidden from view but the data is still on the card. After reformatting, the old data is overwritten as you make new photographs. However, if you use data recovery software before you start shooting again, you may be able to recover most, if not all of your erased pictures.

Here is quick list of a few programs available:

I use PhotoRescue, so I can vouch that it works. It's saved my behind more than a couple of times.


So remember ...

Digital technology is wonderful, but you still have to take some precautions and protect those precious memories recorded in ones and zeroes, especially during the holiday season when the picture-taking kicks into overdrive.

  1. Download
  2.  back up
  3.  and reformat 
– often!


Monday, December 6, 2010

How the pros do it: Way rad surfing shots


Are you an aspiring sports photographer? This is a great video that gives us some insight to how the real pros do it. Real hard core photo geeks might appreciate it more, but anyone who's interested in how great images are made might enjoy watching this as well.

I ran across this on David Hobby's Strobist blog: Hangin' Eight, with Dave Black.

It's a great lesson in how pro photographers are using the latest in wireless lighting technology to produce pictures that really stand out from from the pack. Black walks you through his setup. It's really impressive and enlightening (pardon the pun).

Still intrigued? To get started making these kinds of images, all you need is $5,000 in lighting equipment, a $4800 digital camera, and a $5,800 lens. And an assistant. Oh yeah, and a few years of practice to learn how to use all that equipment and – most importantly - develop an understanding of light, composition, and the necessary sense of timing to capture those great moments.

Are you game?

A comparison of images without, left, and with remote flash. © David Black Photography.

© David Black Photography

Images are the property of David Black Photography and all usage is subject to United States and International Copyright law. ALL RIGHTS RESERVED.


Tuesday, November 23, 2010

Holiday shopping list to unleash the photographer in you

It's that time of year, again. You or a loved one are interested in photography, so you buy a camera. What's next?

Many are satisfied with turning the dial on top of the camera to the green "A" and snapping away. And that's just fine. Have fun! But what if you want to take the next step?

The manual that comes with the camera can tell you how to operate it. But you won't learn how to build a shed just by buying some power tools. There are a ton of books and other resources out there that can lead you down the path to becoming a photographer instead of a snap-shooter. These are some of the top choices, off the top of my head, and they would all make inexpensive gifts to accompany that camera.


Last year, I recommended a book written by my college photojournalism instructor, David LaBelle, called "I Don't Want to Know All the Technical Stuff... I Just Want to Shoot Pictures." And it remains at the top of my list. It covers all the timeless basics – advice that can be executed with any camera. Beautifully written for everyone, not advanced photo geeks and gear-heads. Real, everyday examples. And you just can't beat the price at $9.95. It's the perfect compliment for that camera you just bought for yourself or a loved one. You can order the book from Dave's "The Great Picture Hunt" web site, or find it on Amazon.


Just recently, photographer extraordinaire Joe McNally collaborated with Life to produce "LIFE Guide to Digital Photography: Everything You Need to Shoot Like the Pros." The beauty of this book is that you can grow in your knowledge, skills, and gear, from beginner to pro. The book lists for $29.95, but you can find it at Amazon for around $20. It's a great gift for someone who's just starting and has higher aspirations, or even for an advanced enthusiast. McNally is a master story-teller, and his previous books entertain as much as they inform. This one is no exception.


The above two recommendations come in paperback form. If that's too "old-fashioned" for you digital-centric folks with smart phones and tablets, perhaps try this: "The Digital Photography Book: The step-by-step secrets for how to make your photos look like the pros’!" by Scott Kelby.  This e-book is available in four different digital flavors, including iPhone/iPad versions as well as PDF, for $15.99. Kelby is best known as a Photoshop® and digital darkroom guru, and his book,  “The Photoshop Book for Digital Photographers” and his on-line training workshops are well known and respected in photography circles. As Kelby or any Photoshop wizard will tell you, you have to start with a good original photograph before you can apply any digital magic to it. Otherwise, you're just putting lipstick on a pig! Wherever you happen to be, Kelby will walk you through tips and tricks that will make your photographs better so you won't have to "fix" them later. You can purchase and download the e-book at http://www.ebooks.com/. (This book is also available in paperback from http://www.kelbytraining.com/ and at Amazon.)

So don't stop with that holiday camera purchase. Accessorize! Any of these books are the perfect compliment that will help shed light on all those mysterious camera functions and unleash the photographer within you or your love one.


Tuesday, November 2, 2010

Tip: Learn from your mistakes? Hah! Why not learn from a Pro's instead?


I've mentioned Joe McNally in another post: The best light available – in a flash.

Joe's been around the block. He was, in fact, Life magazine's last staff photographer. Photojournalist. Portraitist. Editorial, commercial, advertising photographer. If you want to learn about lighting, he is one of the pre-eminant sources for information and advice. His workshops are renowned around the world. Joe is also a fantastic, self-depricating, witty writer who's penned several books and writes a widely-read blog.

I've been getting a lot of questions lately about photography – what equipment to buy and advice about making better pictures. Today, Joe beat me to the punch. In his post, he says:

"My buds over at LIFE.com asked me to come up with a list of common mistakes folks make when starting out with a camera in their hands. Okay. No shortage of material here, right? And they came to the right source, ’cause I’ve made every mistake, basic and advanced, that one could possibly think of. Hell, I’ve even invented some mistakes."

Hence, Joe combined some historic photos from Life's archive with some sagely advice.

So, if you want some tips about what mistakes not to make and shoot better pictures, let experience be your teacher and and learn (and laugh) with a master:


Thursday, October 28, 2010

A camera is just a tool, right?


Good light and composition are not dependent on gear.

I get it all the time. I'm out working, and inevitably someone will take a look at my gear and say "I bet that camera takes good pictures."

Well, no, I counter. A photographer takes good pictures. The camera is just a tool. I tell that to anyone who enquires about taking better photographs. I preach it to my students when I teach classes. A photographer understands how to use light and thoughtfully compose an image. A photographer chooses when to press the button and capture a particular moment in time. Owning a nice camera does not make you a photographer.

I might have to eat some of those words.

You can build a house with a hammer and a saw, but you can build one a whole lot more efficiently with some power tools.

For the past couple of weeks, I feel like I've been working with a hammer.

My trusty Nikon D300 wigged out on me. The mirror locked up and the camera essentially became non-functioning. It was my only working body, too, my other one being an old D2Hs with a fried image sensor functioning only as a lens holder. (Useless, unless images with a sickly hot-pink magenta cast are the look you're going for) To simply do my job, I've had to borrow a camera from the Connect Statesboro staff. I'm grateful to them, but it's been an exercise in frustration.

The camera I borrowed is a Nikon D40x, which was the entry-level digital SLR in Nikon's lineup (since replaced by the snazzier D3100). To be sure, it's cable of making fine images within its limitations. But make no mistake: it has its limitations.

Many folks appreciate lightness in a camera body. It's sure a lot easier on my shoulders and neck. But a little heft has its advantages. A heavier body acts as a counterweight against heavier professional-level lenses. The D40 looks and feels downright silly with a 70-200 mm f/2.8 telephoto zoom lens mounted on it. Plus, the camera is made of flimsy plastic. Camera equipment tends to get knocked about in the course of covering news assignments. The build does not inspire confidence.

Like I said, this camera is capable of making good images. I shot a fairly bang-up portrait for the cover of one our monthly publications. Light and composition are two of the three most important elements of good photography. That part never changes, regardless of your gear. The third – timing – is where I consistently have experienced frustration. And, in photojournalism, I can't think of anything more important than timing.

Missed a funny moment while D40 searched for focus

I'm accustomed to a camera responding instantly. I shoot a frame, and the D300 was instantly ready to shoot another. If I needed to shoot a burst of frames, I've had up to 30 or so frames available, at 8 frames per second, no less. Not so with the D40. Sometimes, there is a lag when I press the shutter release. Sometimes I have to wait before I can shoot again. Nikon claims "instant response time" and "3 frames per second burst rate," but I beg to differ.

Plenty of light? No problem. Typical human movement? Sufficient. But news photography frequently requires shooting action in low light. Thank goodness all of our local high school and college football teams were playing out-of-town games last weekend. Still, I was cursing as the D40 struggled to make in-focus, properly exposed images at a Halloween haunted house.

So, if you ever wondered what you get when you spend megabucks on a digital camera, this is what differentiates a model with pro features from an entry-level camera:

  • Durable build. When you drop big bucks on a camera, you should expect something that can take a reasonable beating. The camera body itself will outlast the electronics that make it function. (e.g. my D2Hs) Higher end models come with a degree of weather sealing, too, to keep moisture and dust from invading the electronics inside your camera. Not water-proof, mind you. I wouldn't suggest shooting with any sophisticated electronic cameras in a driving rainstorm. But a gentle sprinkle shouldn't make your gear lock up.

  • Processing power. A digital camera is essentially a mini-computer, and you can expect the same difference in performance that you would between a $500 computer and a $5,000 computer. Every camera function is dependent on processing power, from responsiveness, to autofocus speed, to image processing, etc. An entry-level DSLR is just fine for most folks. But when you need to make a couple thousand images in one day ( and sometimes I do), you need something more robust.

Those are the main things, but some other niceties come with a bigger price tag. Ergonomics and convenience, for example. Instead of having to scroll through endless menus to change certain settings, pro models have lots of buttons and dials right at your fingertips to quickly make adjustments. You get what you pay for.

Perhaps I needed to spend more time with the D40x to squeeze the most out of its potential. It's the kind of camera that would suffice more many, or most, photography enthusiasts. In fact, it would be a great used purchase for those looking to step up from a point-and-shoot. It's not a power tool, however. (Well, maybe one of those off-brand power tools you can buy at discount stores.)

My equipment breakdown has expedited the approval by our corporate folks for a new D300s camera body, which should arrive in the next day or so. Just in the nick of time, because there are football games Friday and Saturday with playoff implications. Having two camera bodies is not a luxury for a photojournalist, either. Backup is not the only consideration. I lament the countless pictures I have lost because I was switching lenses. To that end, I should get my trusty D300 back from the repair shop fairly soon, too.

I can't wait, because it sure takes good pictures.


Friday, October 1, 2010

Link: Headshots don't have to be boring


SLIDESHOW
Photo focus: Creative headshots
from reuters.com

Usher poses for a protrait in NY.
(REUTERS/Lucas Jackson)

Mention the topic of "head shots" to a lot of news photographers, and you just might get a groan as a response. Little postage stamp-sized pics that are used to simply identify the subject of a story or a quote don't typically get the creative juices flowing. Plus, they are overused and over-assigned, as I professed in a previous post.

Unfortunately, some assignments lend themselves to little more. Depending on the notoriety of the subjects, the only access you might get is when they are speaking at a podium or some other kind of heavily controlled environment.

However, I ran across a slideshow on the Reuters news service site that just goes to show how really good photographers can still see things in unique ways.


Monday, July 19, 2010

The best light available – in a flash


Low light? No problem - usually. Available light can be beautiful.
We photogs are always thinking about light. I posted, a while back, about the interplay between light and shadow, and how it can make or break a photograph. Some photographers simply have a gift for seeing light and using it to create a special quality to their photographs. Sebastiao Salgado is one of those that comes to mind. He always shoots in black and white, but the light is one of the first qualities that jumps out at you. And it's always available, existing light, sometimes in conditions where some of us would just give up and not even bother to shoot. It's truly a gift to be able to see like that.
I'm a big proponent of available light photography and it's usually how I approach most assignments. By using available light, I can operate less obtrusively. It allows me to become more of a fly on the wall instead of being the center of attention. It's also a challenge, both technically and creatively, to figure out how to use available light to your story-telling advantage. Fortunately, today's latest professional level digital cameras are much more sensitive to light and create higher quality results than even the most sensitive film. (Sorry point-and-shoot owners. These low-light advantages don't yet extend to inexpensive consumer cameras due to 1) cost, and 2) the laws of physics. If you're interested in the technical reasons, try this link: What Is... ISO)
But the amount of light isn't the only consideration. First, there's the quality of the light. Is it hard, creating contrast and deep shadow areas? Or is it soft, with little or no shadows or contrast? You have to consider the direction your subject is being illuminated from: are any shadows working for you or against you? Sometimes the color of the light is a consideration, especially when you have mixed light sources, such as direct sunlight, shade, incandescent light bulbs, or florescent lights. They all have a different hue, and that can cause problems when they are mixed together.
Flash allowed me to make a better portrait by
    filling in ugly mid-day shadows and cleaning
    up a busy background.
So what do I do when the quantity and quality of light are working against me? I gotta break out the flash. I have mixed feelings about flash photography. As I mentioned before, I prefer to work unobtrusively and fade into the background. I feel the pictures that result from this approach and the moments they depict are more honest. Sometimes, I worry about altering the existing scene by introducing artificial light. However, in the interest of professionalism, particular assignments or subjects (often portraits) simply call for some lighting help.
I have a great admiration for photographers who are masters of lighting their subjects. Like I said, light can make or break a photograph, and some photographers are extremely creative in the way they use flash. One of my favorites is Joe McNally, because his background is in photojournalism and the way he works and lights his subjects is closer to what I do than many of the fashion and portrait photographers famous for the look of their images.
W. Eugene Smith (whose quote is the inspiration for the name of this blog) was known for his dramatic use of available light in his photographs. But everything isn't always as it seems. Once, when asked by a student if available light was the best kind of light, Smith responded
"Available light is any damn light that is available! "
 Indeed, Smith often had to augment the existing light by stringing up flood lights due to the lack of film sensitivity in his day. However, once the lights were up, his subjects went about their lives as though they (the lights and Smith) weren't even there.
Unless I'm making a portrait that requires some measure of direction, I try to take the same approach as Smith when introducing flash to a scene.
Unlike commercial photographers who often use powerful studio strobes to drown out existing light, photojournalists usually try to keep their equipment to a minimum and are more interested in balancing flash with the existing light. There are two basic approaches to accomplishing this.

Using flash as fill
Mid-day sun needs help.
You may be familiar with the term fill flash. Essentially, it's using flash to reduce the amount of contrast between the highlights and shadows in a scene. With today's digital cameras, it's a fairly easy operation. Expose for your scene highlights, and the camera will automatically determine how much flash is needed to fill in the shadows. This is especially useful outdoors at mid-day or indoors when the main source of light is overhead. Light from above is notorious for creating deep shadows in the eye sockets and under the nose. You can overdo fill flash. Too much, and your scene looks unnatural. But a subtle use of fill flash can open up those faces in the shadows. 
Fill-flash saves the day.
Even basic consumer point-and-shoot cameras are capable of pretty decent fill flash results, and I would recommend using fill flash outdoors during the middle of the day. Just find out how to take your flash out of the automatic mode, turn it on, and let your camera do the work. You might be surprised at how a little fill flash can really make your photos pop!

Using available light as fill
Sometimes, your light levels are just too low and you need some help to make publishable images. In these cases, the flash becomes your main light. However, you still have to balance it with the existing light unless you want your subjects floating in space. In essence, your existing light become the fill. When using this approach, the best results are achieved if you can get your flash off the camera. On-camera flash produces flat light. You lose any sense of shape and three-dimensionality. Most camera manufacturers make sync cords that maintain full exposure functionality so you can hold the flash off to the side or place it on a light stand. Those cords can be unwieldy, however. My trusty Nikon Speedlight offers an additional option - wireless flash. Thanks to the folks at Nikon and their Creative Lighting System (CLS), I can place my flash almost anywhere and still maintain full control right from the camera. It's a great option to add natural looking light from nearly any direction.

One flash with diffuser dome, camera left, on a stand about 10 feet high, fired wirelessly, creates a soft-but directional light. With the existing light used as a fill, it creates a nice, natural three-dimensional look.
Unbalanced flash = lost in space


Off-camera flash isn't an option for most point-and-shoot cameras. And at low light levels, the built-in flash often overwhelms any ambient light. You've probably seen the results: faces floating in space. Many consumer cameras have a flash mode often referred to as "slow." If your camera has this mode, it will utilize slower shutter speeds to better balance the flash with the available light. You might get a little image blur in the background at times, but try it and see if you like the results.

One more tip - soften it up
Most natural sources of light bounce all over the place, reflecting off of many surfaces, producing a softening or diffusing effect. A bare electronic flash tube creates extremely hard light from a small source. That combination is undesirable because it typically produces a harsh, unnatural quality of light with ugly shadows. There are many tricks to make the light from your electronic flash appear more natural. 
If your flash head can tilt and swivel, you can point it towards the ceiling or a wall. This is referred to as bounce flash(Gotta give Canon and their tutorials a little love, too) The resulting light will bounce off the surface, producing a much softer, broader light for a more natural look. However, light bounced off the ceiling will still produce the same undesirable shadows as any light source from above, only softer and less contrasty. To combat that, you can attach a "bounce card" to your flash to redirect some of the light forward to fill in the shadows. There are many commercially produced bounce devices, but anything with a white surface will work – even a piece of paper.
Another approach is to diffuse the light by putting something white and translucent in front of the flash to soften and spread out the light. (Don't cover your lens, though!) Again, there are many commercial products that can accomplish this, but you can use anything that's handy, in a pinch. My flash shipped with a white, plastic translucent dome that fits right over the flash head. It diffuses light forward and to the sides. If I tilt the flash head upwards, the light goes in all directions, giving me the benefits of both diffusion and bounce flash. It's about as natural and soft as as you can get from a small light source. In fact, it almost never comes off my flash.
Putting it all together: flash with a dome diffuser bounced off the ceiling and balanced with existing light allowed me to capture a story-telling moment in dim lighting conditions.

Diffusion and bounce flash are problematic for point-and-shoot cameras. Most of their built-in flashes are fixed and very close to the lens. About the only advice I have for you is to try this: Do-It-Yourself - Ten-Second Flash Diffusion. Let me know if it works!

In the end ...
Electronic flash is just another tool in the arsenal. The main objective is still to tell stories, share moments, and make connections.  Personally, I'll take the golden glow of evening light that Mother Nature graces us with over anything artificial. (The light at dawn is amazing, too, but anyone who knows me understands that it's going to take a significant assignment for this night owl to roll out of bed in those wee hours.)
Anyway, I'm done with this lighting tutorial. There are numerous resources by those more knowledgeable and talented than I. For more reading on flash photography, try these blogs:


Strobist by David Hobby


Friday, July 9, 2010

Lag is a drag: Tips for shooting candids with point-and-shoots

Can you say "Cheeeeeeeeeeeeeeeeeeeeeeeeeese?"

Back from vacation. Nine days away from the grind of daily newspaper production. It was nice, but vacation with a 2-year-old can be hard work, too. I've been back on the job a few days, finding my sea legs, thinking about something worthwhile to write about.

One of the things I discovered on vacation, much to my chagrin, is that someone has taught my son to say "Cheese!" when a camera makes an appearance.

Chagrin? That's cute, you say. Right?

Well, first, that "cheese" is really a "chaaaaaaaaaaaaaayze" which results in anything but a smiling, happy face. Second ...

Okay, I'll admit it. I can be a snob. I just can't abandon my professional approach when photographing family and friends. I'm a passionate admirer and advocate of candid photography. Always. To the point that I think some people are afraid of (or annoyed with) me.

Now don't get me wrong. I enjoy great portraiture. There are tons of photographers who have a gift for using light and working with subjects that results in memorable photographs. That takes great skill and talent. But I'll confess it drives me crazy when I watch folks with cameras proceed to line up their subjects and either elicit silly faces and poses, or wait – seemingly forever, sometimes – for everyone to put on their "best" faces.

No cheeseball here. Just a real moment between 
father and son.

If those kinds of pictures constitute memories for folks, that's great. Photography should be fun. Me? I guess I prefer my family photos to be like my news photos – real. Honest depictions of what really happened. Of how people really looked and acted instead of how they behaved for the benefit of a camera.

It can be a challenge, both with family and on the job, when some people freak out at the sight of a camera. But I persist in my candid approach, much to the chagrin (there's that word again) of others. I think it's worth the effort, though. You can win people over when they see the results.

I learned a few things myself about shooting candids over vacation. I borrowed a point-and-shoot camera so I wouldn't have to lug my work gear down to the beach and other locales. That would feel too much like work and I was, well, on vacation.

One thing, for sure, is that point-and-shoot cameras are made to make snapshots easy-peasy, Unfortunately, they are not built to make candid photography a breeze. Internet social networks are saturated with cheeseball pictures, and it's no wonder. These cameras are designed and built for cheeseball. You take the camera out of the box and commence to shooting. It's not long before the complaints start. Why are my pictures blurry? or Why won't the thing take a picture when I push the button? The fact is, the default settings on nearly all point-and-shoot cameras are designed to shoot still lifes – not living, breathing, moving people.

The reason for this post is to pass on what I learned during my getaway. If you want to learn how to shoot candid photographs of your friends and loved ones with your point-and-shoot camera, here are some tips.

Lag is a drag

I knew Jasper would turn and look
when his mother called out to him.
Anticipation is key.

The first thing you must be aware of is something called lag time, and there are two types of lag time you need to be aware of. The first is unavoidable. A brief amount of time passes between the time you see something, your brain processes it, you press the shutter release, and the camera actually makes the picture. If you wait until you see a moment to press the button, you've missed it. So anticipation is extremely important in candid photography. In reality, you must press the button slightly before the moment you want to capture actually happens. How much before? That depends on how fast your brain and finger work together. And it depends on the second type of lag time: shutter lag.

The shutter is the little mechanism in every camera that opens and closes to let light in and make an exposure. There is a small, but measurable amount of time between when you press the button and the shutter actually opens. Many of you may have probably experienced it – you push the button and the camera hesitates before it actually takes a picture.

Cameras differ in the amount of shutter lag, and it is usually commensurate with the cost of the camera – the cheaper the camera, the longer the lag time. Shutter lag is measured in milliseconds with costlier cameras and basically unnoticeable. Shutter lag in point-and-shoot cameras is usually noticeable and often aggravating. Ultimately, you are going to have to get a feel for the shutter lag with your particular camera and learn to anticipate moments.

Red-eye reduction is the devil

Nice moment. Devil eyes.

Red-eye. You know. When your subjects' eyes take on that demonic glow. It's caused by the light from your flash reflecting off the retina. Unfortunately, if you like to capture spontaneous moments, the cure is worse than the ailment. To battle red-eye, camera manufacturers have programed cameras to set off a series of preflashes that reduce the size of your subjects' irises, hence eliminating red-eye. And you've probably seen it in action: a camera-wielder gets everyone in position, tells them to smile, mashes the shutter release button, and the preflashes begin. Some subjects think the preflashes are the actual exposure and change their positions or expressions. The results are pictures with half the subjects still smiling while the other half look like they're already walking away. Sometimes those pre-flashes last so long, I think I can go grab a cup of coffee and still make it back in time for my picture to be made.

Easy fix

If you ever want to delve into candid photography, turn off red-eye reduction. DO IT NOW! That means you will have to explore your camera's menu or (gasp!) read the manual because red-eye reduction is almost always turned on by default.

Besides, red-eye is very easy to remove from your pictures. Most photo-sharing web sites, like Flickr or Picasa, have re-touching options you can perform on-line. Even your neighborhood photo processing lab usually has software that automatically removes red-eye. So don't worry about those ghastly glows when you view your pics in your camera's LCD. It's an easy fix and you'll be glad you captured a meaningful moment, instead.

The Little Green Monster

One of the things people love about today's point-and-shoot cameras is that they can take it out of the box and start shooting pictures. But that's only true to a point. Like I said, the complaints start quickly. Every camera I know of has several shooting modes, and the default mode is the green "A." A for automatic. Set it and forget it. But the automatic mode is limited and not typically suitable for shooting anything that moves. Especially people. So explore some of your camera's other settings. In fact, this may be necessary if you want to eliminate red-eye reduction because the default "A" mode often won't let you make modifications.

"A" is not for action.

Many cameras have a shooting mode especially for action or sports. It is often designated by a symbol showing a person running, or something similar. This is a good starting point for shooting candid pictures because this mode is tailored for stopping action, and that's what you want. Go ahead and try out other modes, too. Experiment and see which ones work best for you. Don't be afraid to leave the "A."

Wait for the moment

Iconic photography pioneer Henri Cartier-Bresson coined a term: The Decisive Moment. This is what he said:

"There is a creative fraction of a second when you are taking a picture. Your eye must see a composition or an expression that life itself offers you, and you must know with intuition when to click the camera. That is the moment the photographer is creative..."

That's the essence of candid photography. Fill the frame with your subjects beforehand. Find your best angle. Create an interesting composition in your LCD or viewfinder. Then wait for life to happen before you. Just be patient. It will happen. It always does. And the satisfaction of capturing those life moments is worth the wait.

Sometimes, the best face is no face at all

The "face" of a 2-year-old.

Pictures can tell the story of your life, and of those around you. A happy, smiling face doesn't always tell the story, though, does it? Maybe the best way to remember your goofy-but-hilarious friend is to shoot his or her picture being goofy. Maybe the bed-head we wake up with at the beach house is more memorable and representative than the picture at the restaurant with perfect hair and makeup.

I've argued this point with editors in newsrooms, and I'll make the same argument to casual snapshooters: sometimes a face isn't necessary at all. Things like scale, and juxtaposition, and body language are all that's necessary to capture the essence of a moment.

Shoot lots and lots … and lots of pictures

You'll end up with more throwaway pics than keepers. This is simply the nature of candid photography. To get good at it, you'll have to practice. By practicing, you'll develop the necessary intuition, anticipation, and patience to capture the spontaneous moments in life you really want to remember.

Worried about filling up your camera's memory card with all those duds that accompany the money shots? Here's one of the beauties of digital photography: you have a delete button. Use it, too, because everyone's a photo editor, these days. Don't show them the outtakes, or you might scare some people off. Just show 'em the good stuff, and you'll be the envy of all your friends and family.

By the way, my wife Kathryn shot many of these pictures, so you don't have to be a pro to capture candid moments with a point-and-shoot. Just have fun!

Three duds. One money shot by my wife Kathryn.

Tuesday, March 30, 2010

Tip: Don't be afraid of the dark ...

Shining some light on the subject of shadows.


First year Giants T-ball coach Todd Hall, 
top right, gives some batting pointers to 
Lijah Williams, 6. The low evening sun-
light from behind not only reveals the 
texture and details of the infield, it 
creates shadows which become the main 
subject of the photograph.
Photographers talk an awful lot about light. After all, without light, there is no photography. How light interacts with the subjects and scenes we photograph can greatly influence how viewers feel about a photograph.

However, if you really want to create interest and drama in your photographs, the absence of light is just as important.

Shadows in the wrong place can ruin a good picture. Mid-day sunlight and florescent light from the ceiling can create ugly shadows in people's eye sockets or under their noses or chins.

Don't be afraid of shadows, though. If you really examine the light in your scene, shadows can make your photographs really come alive.

It's the interplay between light and shadow that reveals shape, form and texture. That interplay creates contrast and drama. Shadows themselves can even become the main subject of your photograph.


Rachel Z unleashes her stylistically diverse music on 
the audience at the Savannah Jazz Festival in 2004. The
spotlight from behind creates drama and reveals form 
by highlighting the edges of the subject.


President George W. Bush returns to Air Force One 
after stumping for Republican candidates in Savannah 
in 2003. Seemed appropriate to photograph a cowboy 
riding (flying?) off into the sunset.
If you want to take advantage of shadows, it's important to notice what direction your source of light is coming from. Light from the side, such as early morning/late afternoon sunlight or window light, is great for revealing texture and shape. Side light creates an almost three-dimensional effect and can cast long, dramatic shadows across your photograph.

Using light from behind a subject is most obvious in silhouettes. Silhouettes with pretty sunrises or sunsets are popular, but also a bit cliche. Properly exposing backlit subjects to reveal some detail in your subject without blowing out the background is tricky and requires some practice. But light from behind can accentuate the form of your subject by highlighting the edges.

If you really want to take your photography to the next level, start exploring light and shadow. Don't be stationary. Walk around your subjects and notice how the interplay of light and shadow changes. Pay attention to how the quality of light changes with the time of day.

And don't be afraid of the dark.


Tuesday, January 12, 2010

Shooting sports: don't stop when the whistle blows

People love sports photographs. There's something magical about freezing a key moment during a game or match, at the peak of action. Still photographs are a different way to experience sports. It's a completely different encounter from reading a sports story, or even watching television replays of unforgettable moments. Athletes are captured, forever, in the midst of sometimes incredible feats. Photographs allow us to examine every detail, every bead of sweat, rippling muscles, the grace, the power, sometimes even the humor.

Sports photography is frustrating for many. To get us close to the action, you need expensive telephoto lenses. You need expensive cameras capable of making a rapid burst of frames, not to mention the capability to freeze action in sometimes poor lighting conditions. Sometimes it takes years to learn the skills and gain knowledge of a particular sport so you can anticipate what the important actions are.

So what can you do if you don't own pro gear or you're just starting out? Here's something that all the best sports photographers know -- don't stop shooting when a play is over and there is a break in the action.

While some pictures of peak action are amazing and show us key moments in a competition, many (most?) are routine and cliche. Many actions in sports are repetitive, such as throwing a football, shooting a basketball, making a golf swing ... they don't necessarily tell us much about the significance of the action. Each individual sporting event has its own story to tell, and frequently those story-telling moments happen after the play ends. Re-action is what you should be looking for. A football player celebrating a sack speaks more to the magnitude of the play than the sack itself. Players get tackled hundreds of times during a game. A shot of a player shooting a basketball doesn't tell us if he made it -- could have been an airball. But a shot of the player reacting and the bench exploding tells you right away without having to read anything.

 Look to the sidelines and in the stands, as well. The reaction of a coach or the looks on fans' faces can sometimes tell you more about the game story than an action shot.


 There's a term coined by pro sports photographers. It's called "chimping," and it describes the act of habitually checking your pictures on your digital camera's LCD screen immediately after making a series of exposures. At first, it was a derogatory term, used to demean photographers who are either insecure in their ability to create correct exposures, or infatuated with their ability to immediately see the results of their effort.

On one hand, chimping is perfectly acceptable. It takes advantage of the ability digital cameras have to give us immediate feedback. It's a great thing to shoot test frames and check for proper exposure and color balance. In the film days, you might have your settings incorrect, and you wouldn't know until the film was developed -- too late, in other words. And I use the capability to mark my best images as I go, so I can edit faster once the event is over.

However, if you're constantly reviewing your images after every play, you're probably missing some of the best shots.

So if you don't have 20 grand or so to outfit yourself like the pros, don't be a "chimp," and don't stop shooting when the whistle blows.

Friday, December 11, 2009

Perfect holiday gift for budding photographers

Still doing your holiday shopping, and you've bought a camera for a love one or yourself? Spend an extra $10 for the perfect compliment. My college photojournalism professor, David LaBelle, recently published a book titled "I don't want to know all the technical stuff ... I just want to shoot pictures."

Today's digital cameras have made photography more simple, and more complicated, than ever. All those bells and whistles can make your head spin. But the basics of good photography remain the same: timing, light, and composition, or TLC. In very simple-to-understand terms, Dave will walk you through the basics and help you learn what the pros already know. It doesn't matter if you're shooting with a $3 disposable camera or $1000+ model. Like Dave says, "Good people make good pictures, not good cameras."

You can order the book from Dave's "The Great Picture Hunt" web site, or find it on Amazon. Best $10 you can spend on a budding photographer.

See Dave talk about the basics on Fox 12 TV in Boise, ID:

Thursday, December 10, 2009

The Grip and Grin: Assignments that make photographers want to scream, part 1

There are certain assignments that make most photojournalists groan when they come across the picture desk. It's not that we're above photographing certain subjects. Rather, it's that we care and want to use the medium to it's best advantage. Space is tight in most publications these days, so publishing photographs that are purely informational really isn't the best way to use that precious space. And sometimes the information recorded really isn't very interesting or relevant.

Not every assignment is going to produce award-winning photographs, and sometimes we photograph certain events to foster relationships with important organizations in the community. But settling for lackluster or cliche photographs is usually the result of a lack of time before publication, a lack of planning, or editors that just don't understand how photographs communicate.

One of the most egregious offending assignments is what we call the "Grip and Grin." I'm sure we've all seen them: check presentations, plaque passings, award ceremonies, ground breakings, people shaking hands and smiling for the camera, etc. Why so offensive? Outside of the people in the photographs, their families and friends, they have very little value to 99.9% of our readers. You have to read the text if you want to find out why people are smiling as they shake hands, exchange objects, or pretend to shovel dirt with spray-painted shovels. And a good photograph should communicate something without having to read the text.

We publish many of these kinds of photographs at the Statesboro Herald. Why? Well, most of them are submitted by people in the community because organizations want people to be aware of their contributions, and our small news staff simply can't cover every event.  And the contributions are newsworthy. I would encourage our contributors to explore ways to shoot different kinds of pictures as an alternative to the standard Grip and Grin. For example, if someone is receiving an award for their charitable works, photograph them doing their charitable activities.  Instead of lining them up and posing them, perhaps make candid photographs or a portrait of the recipient that reveals something of his or her personality -- don't stand them up against a wall and photograph him or her with their plaque. If some organization is making a donation, show us how the money or goods are being distributed. If a new building is being built, show us pictures of the people who will benefit or send us a picture of an artist's rendering of the proposed building.


At a small newspaper like the Herald, sometimes photographing Grip and Grin ceremonies is unavoidable. The identity of an award winner might be secret until it is announced, and there may be too many nominees to photograph ahead of time, for example. So what do I do? If I only have time to photograph the ceremony itself, I try to stick to candid pictures that reveal something about the recipient's personality - those little moments that help us connect. I was able to accomplish this when Ogeechee Technical College presented their Instructor of the Year. When the college's President teased the recipient, I captured a moment that revealed much more than if I had shot her simply holding her plaque.


If I have more time, I talk to the recipient after the ceremony and see if I can photograph them in their environment. I did this recently with the Farm Family of the Year. They were gracious and let me spend some time with them at their farm after the luncheon. The result was a family portrait that communicated what they did for a living for the next day's paper, and I was also able to create a multimedia slide show for our web site.

Grip and Grin ceremonies can be newsworthy because they help us learn about our communities. But the resulting photographs usually aren't particularly interesting or instructive. However, there are always issues and events behind and leading up to the ceremonies, and those can produce newsworthy pictures. So, citizens, share the stories behind the Grip and Grins. That's what I want to photograph!